Crispy Juicy Fried Chicken “Crack”

Y’all, I have a serious addiction to fried chicken, and since the start of this crazy COVID-19 situation, staying at home has only given me more time to obsess about fried chicken and experiment with different ways to make my next “fix” better! Needless to say, putting on the “Quarantine 15” is a real thing! But I’ll work that off later… In the meantime, I’m going to enjoy fried chicken to my heart’s desire and show you how to make this delectably crispy and juicy goodness, too!

After many failed attempts to come up with a fried chicken recipe that embodied both a shatteringly crispy coating yet maintained a juicy sweet meat inside, I think this recipe is the one! The secret to a super crispy coating is adding cornstarch to the flour and drying out the coating before frying, while marinating overnight in buttermilk keeps the chicken meat juicy. Much of the success with making great fried chicken lies not so much in the ingredients, but instead in getting the technique right.

Many fried chicken aficionados swear by using a cast iron skillet to fry the chicken in and using a meat thermometer to gauge when the chicken is done, but since I own neither, I used a small inexpensive deep fryer with excellent results. Honestly meat thermometers intimidate me, or rather, maybe I’m just too lazy to pull one out and use it. If you own a deep-sided cast iron skillet and/or a meat thermometer, then more power to you! My deep fryer has a thermometer already built into it, like most do. This keeps the guesswork minimal for me, which is always a good thing. If you are using a cast iron skillet, be sure to keep your frying oil heated to 350 degrees Fahrenheit, and remember that each time you remove a cooked piece of chicken to replace it with a fresh piece, the temperature of the oil will lower. In terms of oil, which oil is best to use? I remember growing up in Tennessee, my mom used vegetable shortening and sometimes lard. When I fry chicken today, I prefer vegetable oil or peanut oil for their high smoke points and neutral taste.

As for technique, I found that brining the chicken for at least 5 hours or overnight in a salted buttermilk brine will make the chicken really juicy. The enzymes and acids in the buttermilk help break down the proteins in the chicken meat, allowing it to become more tender. The buttermilk also lends a nice and very slight tangy flavor to the meat. When it’s time to dredge the chicken pieces in flour, I use a paper bag to evenly coat each piece of chicken generously and completely. You can use a plastic grocery bag or gallon-size Ziplock bag, as well. For the crispy chicken coating, it is crucial to add cornstarch to the all-purpose flour. This ingredient is non-negotiable. After the dredging of each chicken piece is complete, lay the chicken pieces on a wire cookie rack to dry for about 15 minutes, so that the flour mixture adheres to the buttermilk and stays on the chicken when it enters the hot oil. I learned this after making many batches of fried chicken where the flour fell off the chicken and straight into the bottom of the deep fryer. The last requirement for crispy chicken is to keep the temperature at a fairly consistent 350 degrees F throughout the entire cooking time. I like heating up my cooking oil to 365 degrees F initially, add in the chicken, and then immediately lower the temperature to 350 degrees. Each time you remove the cooked chicken from the grease and add in new uncooked pieces, this lowers the oil temperature slightly and you must adjust the temperature accordingly with each new batch. Another piece of advice for crispy chicken is to not overcrowd the chicken in the fryer/ frying pan. My deep fryer will only comfortably fit 3 drumsticks, so that is all I can fry in one batch. While cooking the other batches, you can rest the already cooked chicken on a cooling rack to drain off the excess oil. This will keep your fried chicken crispy until serving. For drumsticks, it takes about 13-14 minutes to finish cooking. White meat usually takes less time, and thighs take slightly longer. Just make sure that when you make a small incision into the thickest part of the meat, the juices run clear. If you have a meat thermometer, make sure the cooked meat registers between 165 and 175 degrees F.

So now that I’ve shared with you all my fried chicken secrets, I hope you will try my recipe. You will be hooked! Just don’t come looking for me when you can no longer pull the zipper up on your pants (I’m still trying to figure out that one myself!).

** Disclaimer: Please note that the highlighted links in this post are affiliate links, in which I will earn a small commission (at no additional cost to you) if you purchase through those links. I have purchased all the products I recommend with my own funds and have tested and used each product before I post. Please know that I only recommend products that I like and trust and genuinely believe would help my audience. Thank you for your support of my blog in this way!

Crispy Juicy Fried Chicken “Crack”

-Serves 6

Useful Equipment:

Ingredients:

  • 4 to 5 pounds of chicken, cut into pieces (I used 10 drumsticks and 6 wings)
  • For the Buttermilk Brine:
  • 4 cups full fat buttermilk (32 oz.)
  • 1/2 cup hot sauce (I use Louisiana Hot Sauce –don’t worry, this won’t make your chicken spicy, it just adds incredible flavor!)
  • 2 tablespoons Kosher salt
  • 1 teaspoon ground black pepper
  • 1 tablespoon garlic powder
  • For the Chicken Dredging Mixture:
  • 4 cups all-purpose flour
  • 1 cup cornstarch
  • 1 tablespoon Kosher salt
  • 1 tablespoon Lowry’s Seasoned Salt
  • 2 teaspoons garlic powder
  • 1 tablespoon paprika
  • 1 teaspoon black pepper
  • 1 teaspoon dried oregano
  • 1 teaspoon dried basil
  • 1 teaspoon cayenne pepper
  • Vegetable or Peanut Oil for frying (need enough to fill the deep fryer to the “MAX” line, or halfway up the cast iron pan)

Instructions:

1. Whisk together all the buttermilk brine ingredients in a large bowl. Add the chicken and coat each piece thoroughly in the buttermilk mixture. Cover the bowl with plastic wrap and place in the fridge for 5 hours to overnight.

2. After marinating, bring the bowl of chicken out and set on countertop. Fill the deep fryer or skillet with the cooking oil. Heat oil to 365 degrees F.

3. Prepare the dredging mixture by combining the flour, cornstarch, and spices into a sturdy brown paper bag or resealable plastic bag. Shake vigorously to mix all ingredients.

4. Remove chicken one piece at a time from the buttermilk mixture and add each chicken piece individually to the bag of flour mixture. Shake the bag to coat the chicken thoroughly, pressing the chicken into the dredging mixture to get a good coating of flour. Tap off the excess flour.

5. After the dredging step, place each piece of coated chicken onto the cookie cooling rack. Make sure there is a cookie tray underneath the wire cooling rack to catch any chicken juices or flour. Allow the chicken to rest on the cooling rack for about 10 to 15 minutes until the flour mixture coating the chicken forms a paste-like consistency. This is crucial for developing a crunchy chicken skin!

Allow the chicken coating to dry out and form a paste-like consistency.

6. Carefully place the coated chicken into the 365 degree oil and lower the temperature to 350 degrees. Do not overcrowd the fryer and only fry 3 pieces at a time. Fry the chicken for about 14 minutes, keeping in mind that white meat cooks a little faster than dark meat. Turn each piece of chicken over in the oil every 3 minutes. The chicken should take on a nice golden brown color. If you have a meat thermometer, the inside should reach a temperature of at least 165 degrees F. If you don’t have a meat thermometer, you can make a small cut into the thickest part of the chicken piece and see if the juices run out clear. If not, fry the chicken for a few more minutes.

7. Place the cooked chicken on a clean wire rack to cool and let sit for 5 to 10 minutes before serving. This will allow the chicken to become extra juicy! If you have a large amount of chicken to fry, you can warm up any cooled chicken pieces in a 350 degree oven until warm and crispy. Serve with your favorite sides!

If you have a favorite way to fry chicken, please share! I’m always open to learning new recipes and techniques. Until next time, please stay safe and enjoy creating new dishes!


Panna Cotta with Red Berries Simmered in Chambord– So Easy Even a 9-Year-Old Can Make

Okay, I’m not playing around when I come up with these long-arse titles! If you want an impressive and satisfying dessert that requires no culinary school degree to make, then you’ve come to the right place! Whether it be an ending to a memorable dinner with special guests, or a date night with the family, panna cotta is a sure pleaser. And best of all — it’s so easy, even a 9-year-old can make panna cotta! I kid you not. How do I know this? Because my second oldest daughter’s favorite dessert is panna cotta, and after dozens of requests to make it for her, I got so sick of it that I taught her how to make her own. She was 9 years old at the time. See?

Panna cotta is an Italian dessert which translates to “cooked cream” because it’s made of sweetened cream thickened with gelatin. The cream can be infused with flavors such as coffee, vanilla, citrus, or other essences. It is then poured into molds. Panna cotta reminds me of a mix between flan, crème brulee, and creamy Jello, but oh so much better!

In this recipe, I use vanilla extract to infuse flavor into my cream. Be sure to use a good quality vanilla for optimal aroma and flavor. I wanted to keep the panna cotta simple in order to be a wonderful backdrop for the red berries simmered in Chambord liqueur! If you don’t want to use alcohol or don’t have any Chambord on hand, you can opt to skip the liqueur altogether and just simmer the berries in sugar water or juice until a nice syrup forms. And yes, the alcohol does cook off as the sauce simmers, so 9-year-olds don’t get tipsy eating this. However, if you want to refrain from adding alcohol to your dessert because you will be serving minors, the berry sauce will taste delicious without it, too!

As for sauces to top your panna cotta, I used berries here because…it’s what I had in the fridge, and they were looking sad and about to go bad. The Chambord really helped them along with its decadent black raspberry fragrance and sweetness. You can use berries (preferably fresher and perkier berries than mine), but you can also pour over melted chocolate, or simmer fruits in Grand Marnier, if that’s your thing. Definitely be creative!

A match made in heaven!

** Disclaimer: Please note that the highlighted links in this post are affiliate links, in which I will earn a small commission (at no additional cost to you) if you purchase through those links. I have purchased all the products I recommend with my own funds and have tested and used each product before I post. Please know that I only recommend products that I like and trust and genuinely believe would help my audience. Thank you for your support of my blog in this way!

Panna Cotta with Red Berries Simmered in Chambord

–Serves 6

Ingredients:

  • Unflavored gelatin, 1 envelope or 1 tbsp ( I use Knox brand gelatin)
  • 2 tablespoons cold water
  • 1 cup Half and Half (or 3/4 cup whole milk mixed with 1/4 cup heavy cream)
  • 2 cups Heavy Cream
  • 1/2 cup sugar
  • 2 teaspoons Vanilla extract ( I like Nielson-Massey Madagascar Bourbon Vanilla Extract or Rodelle Pure Vanilla Extract)
  • For the Berry Sauce:
  • 8 ounces, or 1 cup, fresh (or frozen) raspberries, strawberries, or both
  • 1/4 cup granulated sugar
  • 1/2 cup Chambord liqueur (**If not using liqueur, you can substitute with 1/3 cup fruit juice or water)
  • 1 teaspoon cornstarch
  • 1 teaspoon water
  • Helpful Equipment and Materials:
  • Ceramic or glass ramekins (6), measuring cups, measuring spoons, wire whisk, small saucepan
Simple ingredients

Directions:

1. Measure and pour 2 tablespoons cold water into a very small saucepan. If you don’t have a very small saucepan, you can also add the water to a small microwave-safe bowl. Sprinkle the gelatin over the water and wait about 1 minute for the gelatin to soften. Heat the gelatin mixture in the saucepan over low heat until the gelatin dissolves completely. Remove from heat. If using the microwave to dissolve the gelatin, place the small bowl with the gelatin mixture into the microwave and (depending on the power of your microwave), heat the mixture up for about 30 seconds and add increments of 10 seconds if needed, until gelatin dissolves.

Gelatin is softening.
Dissolving gelatin over low heat

2. Combine the cream, half & half, and sugar in a large saucepan. Bring the mixture to a boil over medium-high heat, stirring frequently. Remove the saucepan from the heat and add the dissolved gelatin mixture and vanilla extract. Stir well.

3. Pour the warm cream mixture in equal parts among the 6 ramekins. When the ramekins have cooled to room temperature, cover each one with wrap, place them in the refrigerator, and chill for at least 4 hours or overnight. When they are thoroughly chilled, the panna cottas will be firm to the touch, similar to the consistency of flan or jello.

4. As you are waiting for the panna cottas to chill, you can make the berry Chambord sauce ahead of time, or wait before serving time to prepare the sauce. In a heavy saucepan, combine the raspberries, strawberries, sugar, and Chambord liqueur. Bring the saucepan to a slow boil. Lower the heat to a simmer and cook for about 7 minutes. At this point, you can opt to make a smooth sauce by breaking up the berries with a wooden spoon. I prefer chunky berries in my sauce and don’t mind the seeds, so I keep them sliced in large pieces or whole. For a smooth seedless sauce, after cooking is finished, run the mixture through a sieve to remove the seeds.

5. In a small bowl, dissolve the cornstarch in 1 teaspoon of cold water. Return the berry mixture to the stove and bring to a simmer. Whisk the cornstarch mixture into the simmering raspberry sauce until the sauce thickens, about 1-2 minutes. Remove from heat. You can refrigerate the sauce at this point and warm it up slightly before spooning over the panna cotta.

6. To remove and plate the panna cottas for serving, dip each ramekin into a bowl of hot water for 5 seconds. Take a thin knife or small metal spatula and run it around the edge between the panna cotta and the ramekin to loosen the dessert. Invert the ramekin onto the plate of your choice. Spoon a generous amount of berry sauce over the panna cottas and serve.

Dip each ramekin into hot water for a few seconds to help loosen the panna cotta.

Buon Appetito!


Brazilian-Inspired Heart of Palm Salad — Bikinis Not Included

We recently poured down cement to make a long driveway at our bayhouse, since the grass seems to grow like it’s on steroids and I’m always terrified of the thought of stepping on a snake in the grass (no pun intended). Now that the big driveway has cut down significantly on lawnmowing time and keeps everything within clear eyesight, the only obstacle is maneuvering the winding path in the dark. One particular palm tree in the yard keeps getting rear-ended by unsuspecting cars, so we had to make the difficult decision to chop it down. Sorry, tree-huggers.

If you’ve ever eaten at a Brazilian steakhouse, then you’ve probably seen their vast salad bar filled to the brim with colorful fresh produce. One staple that you’ve probably tried is heart of palm– that tubular white, delightfully crunchy vegetable that resembles the taste of artichoke hearts. Heart of palm is the center part of the trunk of certain varieties of palm tree. The outside of a mature palm tree is huge compared to the actual edible inner core, and it takes around 4 to 6 years for a palm tree to mature, so harvesting your own heart of palm may not be the most environmentally sustainable method to obtain this culinary treasure. Thank goodness there are commercially operated palm tree farms where hearts of palm are harvested, brined, and packed in jars for grocery store shelves. I have seen them sold in bulk before in Costco. Not only is heart of palm delicious, it is quite healthy! Heart of palm is low in calories (20 calories per 1/2 cup), low in fat, high in fiber, promotes heart health, improves blood sugar control, provides a natural source of iron, Vitamin C, Vitamin B6, among other micronutrients. And of course, when we think of Brazilians, we think of those beautiful bronzed bikini bodies! Heart of palm supports weight loss by providing non-starchy high fiber and water content, so you can feel full faster without consuming many calories.

So back to the tree my husband chopped down. He presented me with the inner part of the palm tree trunk, and it was still this big log-looking thing. To get to the heart, I had to continue to peel back the thick hard layers until I reached the tender white core. A whole tree and hours of effort later, it came to this much awaited moment.

To keep the white heart of palm from turning brown, I quickly blanched it in a pot of salted boiling water for about 15 seconds. I then removed it to a colander and rinsed the heart of palm under cold water and set aside. Now to make a refreshing salad! I realize not everyone will have the opportunity to chop down a palm tree on a whim, nor will fresh palm tree hearts be readily available. Therefore, store-bought canned or jarred hearts of palm are perfectly acceptable for the following recipe. I added avocados for creaminess and hothouse cucumbers for crunch. Feel free to add or substitute any of your favorite veggies. You can also choose your favorite dressing. I opted to go simple and use a cilantro lime vinaigrette to highlight the refreshing taste of the heart of palm.

Brazilian-Inspired Heart of Palm Salad

Ingredients: (serves 2-4)

  • 3 cups sliced heart of palm (canned, jarred, or fresh <if using fresh, be sure to blanch in boiling water for a few seconds>)
  • 1 large red tomato, diced
  • 2 spring onions, thinly sliced (less if you don’t like onions)
  • 1/2 of a small red or white onion, thinly sliced (I used sweet white onion)
  • 1/2 to 1 whole hothouse cucumber or other seedless variety, diced
  • 1 ripe but firm avocado, cut into cubes
  • Cilantro-lime Vinaigrette:
  • 2 tablespoons fresh lime juice
  • 1 teaspoon honey
  • 1/2 teaspoon kosher salt
  • 2 tablespoons extra-virgin olive oil
  • 1 tablespoon minced fresh cilantro
  • freshly ground black pepper

Directions:

1. Place all salad ingredients in a large bowl and combine gently with salad tongs.

2. Add all vinaigrette ingredients to a bowl and stir until well-mixed.

3. Pour vinaigrette dressing onto salad and serve chilled.

Hope you try out and enjoy this healthy and delicious salad! Please share with me how you like to prepare heart of palm.


Absolute Worst Sky-High Lemon Meringue Pie Ever

Don’t hate me because I’m beautiful!

Welcome! While the majority of the population googles recipes for the BEST of this and the BEST of that, today you’ve signed up to learn about how to make the absolute WORST lemon meringue pie ever. Ever. You’ve signed up to a pie so bad that it will cause fist fights and week-long silent treatments over who took the last piece. This pie is so bad that it will make you wake up in the middle of the night in a cold sweat, obsessing about when your next lemony fix will come. And worse than a homewrecking floozy, this pie will make you abandon all your new year diet oaths to eating Paleo, keto, low-fat vegan, low-carb, *yawn*…. Yup, you have been warned.

Sorry I haven’t posted in a while. Frankly, the end of 2019 sucked. And the start of 2020 wasn’t much better, with all the world disasters (wildfires, earthquakes, coronavirus, etc.) coming at us one after the other. In my own world, the company I work for had yet another lay-off, which seems to come more regularly in recent years. Such is the fate of working for Corporate America. I was sad to see several of my friends and colleagues go, and while I kept my position, the whole ordeal was rather stressful and disheartening. But like anything in life, setbacks make us stronger, more resilient. Winters take out the old foliage, and spring brings back new growth. So I literally took comfort in God, my family, my friends, and my garden. And when “life handed me lemons,” I literally took the lemons from my lemon tree and made lemon meringue pie!

After many years of trying to make a fail-proof lemon meringue pie, I think I finally found the perfect recipe. If you follow this method and recipe carefully, I promise your pie will be luscious–with a sweetly tart lemony filling and a billowy meringue that doesn’t shrink, get watery or weep.

The keys to a perfect meringue are as follows: (1) absolutely CLEAN (spotless, no greasy residue) metal or glass beating bowl, as well as beaters and utensils. If you have one, use a copper mixing bowl. I am a macaron-baking freak, and I learned that using a copper mixing bowl gives me the best results for meringue. Copper ions in the mixing bowl bind with proteins in the eggs to form stable complexes, making the whipped egg whites less likely to unfold. (2) Separate egg whites from the yolk cleanly with no yolk fragments or droplets present in the whites. It is easier to separate the yolks from the whites when the eggs are cold because the yolks are firmer. (3) Use room temperature egg whites when beating into a meringue. I learned this trick when I learned how to make macarons. Room temperature egg whites are more viscous (sticky, gooey) and permit air to be easily incorporated into them. This air will add volume to your meringue. Let egg whites sit at room temperature for about 20 to 30 minutes before beating. (4) Do not over-beat the egg whites beyond the stage of stiff peaks. This will break down the protein matrix and cause the fluffy white foam to break down, resulting in an undesirable flat, watery, and grainy mess. (5) I learned from several online sources that if you add a gelled cornstarch/water mixture while beating your meringue, the cornstarch will further help the meringue stabilize, thus allowing it to be fluffy and hold its majestic peaks when cooked. This also prevents weeping, which is the formation of little sugar droplets that condense on your cooled meringue. (6) Use a superfine sugar, such as caster sugar, to gradually add into your egg whites while beating. While this is not quintessential, it helps produce a smooth, non-grainy meringue that does not weep after baking. (7) When spreading the meringue onto your pie filling, be sure the lemon filling is piping hot and that the meringue touches all edges of the pre-baked pie crust. This is crucial to prevent the meringue from shrinking.

The keys to a perfect lemon pie filling are as follows: (1) Make sure to use fresh lemon juice from fresh lemons. That sour bitter concentrated lemon juice in those plastic yellow lemons in your grocery aisle is down-right nasty. (2) Add cornstarch to the egg yolks and boil the mixture long enough to prevent a runny filling. The cornstarch will prevent the hot egg yolks from curdling. Trust me on this one.

When your absolutely bad lemon meringue pie finishes baking and cooling, you can slice it cleanly by dipping a knife in hot water before cutting. Let the pie wars begin! You have been warned!

For this pie, you can use a store-bought pie crust, or if you have time, I highly recommend a homemade pie crust. For this lemon meringue pie, I made a from-scratch sour cream pie crust (recipe will be included in a future post).

** Disclaimer: Please note that the highlighted links in this post are affiliate links, in which I will earn a small commission (at no additional cost to you) if you purchase through those links. I have purchased all the products I recommend with my own funds and have tested and used each product before I post. Please know that I only recommend products that I like and trust and genuinely believe would help my audience. Thank you for your support of my blog in this way!

Absolute Worst Sky-High Lemon Meringue Pie Recipe

Useful Equipment:

Ingredients:

  • 1 pie crust, preferably a flakey butter or shortening crust — homemade is best, but some store-bought brands are decent.
  • For the Lemon Filling :
    • 5 egg yolks
    • 6 tablespoons cornstarch
    • 1 and 1/4 cups granulated sugar
    • 1/4 teaspoon Kosher salt
    • 1 and 1/2 cups water
    • 1/2 cup freshly squeezed lemon juice (be sure to remove all seeds)
    • 3 teaspoons lemon zest
    • 2 tablespoons unsalted butter
  • For the Sky-High Meringue:
    • 5 to 6 egg whites (brought to room temperature)
    • 1/3 teaspoon cream of tartar
    • 3/4 cup caster (superfine) sugar
    • 1 tablespoon cornstarch
    • 1/3 cup cold water
    • 2 small packets vanilla sugar– I use Dr. Oetker Vanilla Sugar. I like using dry vanilla sugar because the drier the meringue ingredients, the more stable it will be. Also, the vanilla flavor is stronger and more fragrant than vanilla extract in my opinion. If you don’t have vanilla sugar, you can use 1/2 teaspoon pure vanilla extract like Nielsen-Massey Pure Vanilla.

Directions:

1. Pre-bake the pie crust. If you are using store-bought pie crust, please follow the package directions on how to pre-bake. For homemade crusts, pre-heat the oven to 375 degrees F. Using a fork, poke holes into the bottom of the crust to prevent it from puffing up. Tear a piece of parchment paper big enough to lay over and cover your pie crust. Take a second glass pie dish the same size as or smaller than your main pie dish and place it on top of the parchment paper. This serves as a weight so that your crust won’t shrink during baking. If you do not have a second pie dish, you can cover the parchment paper with pie weights or dried beans. Bake 25 minutes or until lightly browned. Remove from oven and allow to cool.

2. To make the lemon filling, first beat the egg yolks with a whisk in a medium bowl. Set aside. Combine 6 tablespoons cornstarch, 1 and 1/4 cups sugar, 1/4 teaspoon salt, and 1 and 1/2 cups water in a saucepan and bring to a boil, stirring constantly. Lower the heat to a simmer for 1 minute or until the mixture begins to thicken like the consistency of a thick pudding. Remove saucepan from heat.

thickened cornstarch mixture

At this time, take the beaten egg yolks that you previously set aside, and take a spoonful of the hot cornstarch pudding mixture and stir it thoroughly into the beaten egg yolks to temper the eggs. Continue stirring in the hot cornstarch mixture by spoonfuls until about half of the cornstarch mixture has been used. Now add the egg yolk mixture back to the saucepan with the remaining cornstarch mixture. Stir to combine thoroughly and return the saucepan to a boil on medium-high heat. Stir constantly while cooking for 3 minutes. Remove the saucepan from the heat. Add lemon juice , butter, and lemon zest. Stir well to combine. Set aside.

Before juicing your fresh lemons, be sure to zest them first. It’s best to use organically grown lemons to avoid pesticides. I love a lot of lemon zest in my pie! If you like, you can save a few zest shavings to garnish the finished pie with afterwards.

3. Turn on oven to 325 degrees F.

4. Take a small saucepan and thoroughly stir together 1 tablespoon cornstarch and 1/3 cup cold water until the cornstarch dissolves. Bring the mixture to a boil over medium heat and stir constantly until the mixture thickens into a gel putty-like consistency. Remove from the heat.

This cornstarch gel will be incorporated into the meringue to help stabilize it.

5. To make the Meringue: Take your immaculately clean mixer bowl and pour the egg whites (5 or 6, depending on how much meringue you want) into the bowl. Add the vanilla sugar/extract to the egg whites. Begin beating the egg whites on a medium-low speed and gradually increase the mixer speed to medium to medium-high.

Mix the caster sugar and cream of tartar together in a small bowl. When the egg whites froth up, gradually add in the caster sugar/ cream of tartar mix to the beaten egg whites in the bowl by a tablespoon at a time. Beat until the egg whites form soft peaks.

soft peaks

At the soft peak stage, begin adding the gelled cornstarch mixture a spoonful at a time, beating the cornstarch gel into the eggs whites after each addition. Repeat until all the cornstarch gel is incorporated, and the egg whites have formed stiff peaks. As a reminder, once stiff peaks have been achieved, stop beating because the meringue will deflate and become a grainy mess!

adding in the gelled cornstarch one spoonful at a time
stiff egg whites after cornstarch addition

6. Place the saucepan with the lemon filling on the stove again and heat the filling until it is bubbling hot. It is important to always spread your meringue onto a hot filling in order to avoid a runny, watery pie. The hot filling will help cook the center of the meringue to some degree. Pour the hot lemon filling into the pie crust and spread the filling evenly.

7. Take a silicone spatula and quickly spread the meringue onto the hot filling, starting with large dollops of meringue at the outer edges of the pie and working inwards. It is crucial to spread the meringue in such a way as to have it touch all edges of the crust, so as to prevent shrinkage of the meringue when baking. Pile the meringue high in the center. You can take a spoon or your spatula and create swirls and peaks in the meringue if you like.

8. Bake the lemon meringue pie at 325 degrees F for 20 to 25 minutes, or until the meringue topping turns a golden brown.

I baked this monstrous meringue pie for a friend’s birthday. The meringue was piled on really high!

9. Let the pie cool completely at room temperature before transferring to the fridge. To slice a neat piece of pie, run a sharp knife under hot water for a few seconds, and then cut the pie.

Lemon meringue pie definitely takes time and patience, but the end result is very worthwhile if done right! Just crossing my fingers no family feuds will erupt over the last piece! 🙂 Enjoy!


Meyer Lemons: What Does Breastmilk Have to Do with It?!

I bet THAT title got your attention, huh?  Yup. Friendly clickbait. Just kidding. You’ll learn why lemons and breastmilk are in the same heading right here, folks.  I have a lovely Meyer lemon tree growing in my backyard that I purchased 14 years ago when I moved to Texas.  It produces an abundance of bright happy yellow fruits most years, with dormant breaks every few years.  In Houston, I’ve noticed that citrus trees tend to produce ripe fruit around the time of Chinese (Lunar) New Year, which is in the January-February time frame.  This lunar new year, the Year of the Rat, falls on January 25th. So the whole idyllic vision of wearing a gauzy sundress and floppy hat and picking fresh lemons in the hot summer afternoons to make a cold glass of lemonade is a total lie…at least here in Texas.  It’s the middle of freezing January, and I’m out harvesting lemons today, wearing a coat.  Not in the mood for a tall glass of icy lemonade.

    Speaking of the cold weather, Houston is bi-polar– It was warm last week, but we get to have winter and a possible tornado warning all in one weekend.  And it happens to be this weekend.  So in order to avoid losing all my lemons in tonight’s freeze like I did in last year’s spur-of-the-moment frost, I had to bundle up and pick all the lemons this afternoon.

    But there’s only so many fresh lemons one needs at any given time, outside of giving them away or making meringue pies.  So, I came up with a nifty way to preserve this precious golden juice.  Years ago after I stopped nursing my last child, I had a surplus of breastmilk storage bags.  Not knowing what to do with them, I saved them in the kitchen cabinet in hopes that I could give the bags to another nursing mom who might need them one day.  When the lemons ripened that particular year, I was overburdened with a surplus of fruit (even after giving many grocery bags full of lemons away to friends and neighbors).  Since I was raised to not waste anything, especially food, I had to find a way to save those lemons.  It was then that I remembered those breastmilk storage bags I had kept in the cabinet.  What a great way to store lemon juice in the freezer!  They were BPA-free, leak-proof, and each held the perfect amount of juice to make a full pitcher of lemonade. In order to use the lemon juice, all I had to do was thaw the bags, and the juice would taste freshly squeezed. Another plus is that if you are trying to be more environmentally savvy, these breastmilk bags can be rinsed out and reused in the future. And there you have it, how lemons and breastmilk are related in this topic.  🙂 Please don’t hate me.

    Here is how I preserve the juice from my Meyer lemons:

**Disclaimer: Please note that the highlighted links in this post are affiliate links, in which I will earn a small commission (at no additional cost to you) if you purchase through those links. I have purchased all the products I recommend with my own funds and have tested and used each product before I post. Please know that I only recommend products that I like and trust and genuinely believe would help my audience. Thank you for your support of my blog in this way!

Even the cats are intrigued…

To extract the most amount of juice from your lemons or any citrus fruit, you need to have a good citrus press.  My favorite press is made by Breville.  I have had this citrus juicer for over 10 years now, and it has not failed me yet.  I really like the Breville citrus juicer because it is fast, efficient, and leaves behind a dry rind.  I liked it so much that I purchased a second one, just in case the first one ever died on me (which it has not…fingers crossed!).

This Breville juicer removes all the juice and leaves behind a dry rind.

Each breastmilk storage bag holds up to about 6 ounces of liquid, which is the perfect amount of lemon juice to make a large pitcher of lemonade.  Fill each bag up to the brim with juice. I mostly use the Lansinoh brand because I like their secure zip-lock closure, but any BPA-free brand will do. Be sure to label the bag as “lemon juice” because some brands have “My Mommy’s Milk” printed on the bags and it freaks out my kids and unassuming visitors sometimes.  The frozen lemon juice will stay fresh in the freezer for 12 to 18 months.  Just thaw and use for lemonade, pies, macaron filling, etc.  I hope you found this post more helpful than weird.  Can’t wait til summer to sip that cold glass of lemonade!  For now, a nice cup of hot cocoa would be nice!

“My Mommy’s Milk” LOL!!!
This frozen liquid gold will stay fresh for 12 to 18 months.

Crispy Succulent 5-Spice Roast Duck That Will Make Your Tongue Slap Your Brain

That title though! Haha! After arriving in the United States as a 4-year old, I spent most of my childhood and young adult years living in Mississippi and Tennessee, so please pardon my Southern phrases every now and then. You can take the girl out of the South, but you can’t take the good Southern food out of the girl, I like to say! And as most people know, we Southerners are very proud of our cuisine! With the 2019 holidays now behind us, the new year is here. And for many Asians, the Lunar New Year is the next major holiday to be celebrated, so what a perfect time to make some delicious roasted duck!

Speaking of living in the South for much of my life, back in the 70’s and up until the early 90’s, it was a bit challenging finding certain ethnic foods from the motherland, especially if one grew up in a small Southern town like I did. Many of my family’s vacations were centered around visiting ethnically diverse meccas like Houston, TX or Orange County, CA. One of my favorite dishes for special occasions is Chinese roasted duck, and back then, even finding a duck in the freezer section of the neighborhood Piggly Wiggly grocery store was like trying to find the Holy Grail. Therefore, it was on these family road trips that my mom would load up the car with Asian ingredients, such as spices, pantry staples, meats, and seafood. We would even buy roasted whole ducks and drive them home frozen in a big cooler.

When the hankering for roast duck was really strong, there were special weekends that my mom would take me to the county outdoor trade fair (an outdoor farmers’ market/ flea market) and buy a live duck there. When I was in 2nd grade, my mom bought 2 live ducks, which I made the mistake of naming Presley and Priscilla (very fitting for growing up outside of Memphis). One day upon returning home from school, there was the aroma of duck and ginger rice soup bubbling atop the stove and no ducks to be found. Needless to say, I cried all through supper and didn’t speak to my mom for days. She said she had to make soup out of the ducks because they were annoying the neighbors and pooping all over the yard. If an HOA existed back then, I’m sure we would have been blacklisted from our neighborhood.

Anyhow, the point of this story is that sometimes you may not have the resources to go to a restaurant to buy Peking duck. Or you may live on a farm and have too many ducks pooping everywhere. Or you just want to spend 2 days making your own roasted duck. Whatever the reason, here I am to share with you how to make your very own Chinese-style roasted duck!

I’m not gonna lie. Making roasted duck from start to finish is not a walk in the park. A walk in the park at midnight in the hood, maybe, but you get my drift. Just kidding. It’s not that bad, just requires a couple days of preparation. First, you need to find a decent whole duck. When I say ‘decent’, I mean a fresh duck is best. In Houston where I now live, there are several Vietnamese-owned poultry farms scattered throughout the suburbs where you can buy a freshly slaughtered and cleaned duck. But if you are in the majority, you can always opt to buy a duck from the freezer section of the larger grocery store chains. The only issue with most frozen ducks is that they contain more fat and also carry more water weight. A better option for store-bought ducks would be to by an air-chilled duck if available. The traditional roasted ducks of Asia use free-range ducks, so they are leaner and will produce a crispier skin. If you can see the duck before buying it, try to choose the one with the least amount of fat under its skin if you desire a crispy duck. If you want a juicy duck, then you can use one with more fat. A few words about farm-bought or Asian store-bought ducks– they will more than likely come with their heads and feet still intact.  I know the duck head might freak some of you out, but it’s actually reserved for the most important guest at the table or the elders in Asia.  So sometimes being V.I.P. isn’t all that appealing, right?  You can of course, ask the head to be chopped off or do it yourself with a heavy butcher knife.

Most Chinese restaurants prepare their crispy roast duck by first using a bicycle pump to pump air into the cavity between the skin and the flesh. This is so the skin will separate from the flesh, allowing the fat to render and drain away. The key to obtaining crispy skin is to get rid of as much moisture as possible. It is desirable for the duck fat to melt and drain out of the duck because any pockets of melted fat will make the overlying skin soggy. I once walked into the cold room of a Chinese restaurant and saw dozens of ducks hanging by their necks with bicycle pumps lying nearby. I have mental issues with sticking a bicycle pump nozzle into a dead duck — perhaps it is the thought of getting duck germs on my bicycle tires, or the crud from the asphalt lodged into my duck. Either way, in this recipe, you need only use your fingers to separate the skin from the meat with comparable crispy results. No bicycle pump required.

If you have ever prepared crispy oven-fried chicken wings using a mixture of baking powder and salt, then this method also works to crispen up duck. The basic pH of the baking powder weakens peptide bonds within the duck skin, allowing it to brown efficiently and become extra crispy. The added salt, as well as the overnight uncovered drying in the refrigerator help dehydrate the duck further for a crispy lacquered skin. Be sure to use an aluminum-free baking powder. Otherwise, the aluminum will give off a bitter taste to the duck, and we don’t want that. Please also use baking powder, NOT baking soda.

Honey gives the duck a beautiful mahogany color when roasted, and the distinctly Asian spices impart a delicious flavor and fragrance to the meat. For maximum flavor, the duck should be marinated overnight or 12 hours while it is also drying in the fridge. Don’t worry about the cloves and other spices sticking to the duck because these will fall off when the duck is immersed into boiling water. This step is essential to get rid of the wrinkles caused by pulling the skin away from the flesh and drying overnight in the fridge. After rapidly dipping in boiling water, the duck skin will tighten back up and look smooth and taut.

Roasting the duck in a vertical position allows the fat to drain downward and out of the bird. Years ago I owned a Ron Popeil Showtime Rotisserie Oven– yes, the “Set it and forget it” oven — when it was all the rage. It made the best roasted duck due to its ability to rotate in a vertical position and efficiently dumped out the melted fat. Since I no longer own a rotisserie oven, I stuff an empty drink can inside the duck cavity to allow it to stand vertically while roasting. This achieves the same results as a vertical rotisserie oven.

The finished crispy roasted duck is usually sliced up and wrapped in Mandarin pancakes or fluffy bao buns, with scallions, cucumbers, and hoisin sauce. Roasted duck can also be served with rice or cut into generous pieces and placed into steaming bowls of ramen noodle soup. However you opt to enjoy it, you can’t go wrong! Happy New Year! Best wishes for good health, good food, and good times!

** Disclaimer: Please note that the highlighted links in this post are affiliate links, in which I will earn a small commission (at no additional cost to you) if you purchase through those links. I have purchased all the products I recommend with my own funds and have tested and used each product before I post. Please know that I only recommend products that I like and trust and genuinely believe would help my audience. Thank you for your support of my blog in this way!

Crispy Succulent 5-Spice Roast Duck

Ingredients:

  • 1 whole duck, about 3 – 4 pounds
  • 1/3 cup honey
  • 2 tablespoons rock sugar, crushed into a powder (if you can’t find rock sugar, you can use granulated sugar)
  • 1/3 cup soy sauce
  • 1 teaspoon salt
  • 9 star anise, set aside 4.
  • 1 teaspoon cloves (not ground cloves)
  • 1 cinnamon stick
  • Two 2″ knobs of ginger (peeled, sliced, and slightly smashed)
  • Outer peel from 2 oranges
  • 1/2 teaspoon black peppercorns, crushed
  • 1 tsp coriander seeds
  • 1 tsp fennel seeds (aniseed)
  • 1 tsp Five-spice powder
  • 1 small bunch of green onions
  • 4 cloves garlic, smashed with the side of a cleaver or mortar and pestle
  • 2 tablespoons kosher salt
  • 2 teaspoons baking powder (use aluminum-free only)
  • One 16-ounce tall can of any drink, emptied and refilled halfway with water or dried beans (refilling helps weigh down the can so duck won’t topple over)

Useful Equipment:

Directions:

1. Rinse duck with water and thoroughly blot dry using paper towels. Place duck on a wire cooling rack (yes, the one used to cool your cookies on). Carefully separate the skin from the meat by inserting your fingers through the bottom of breasts and slowly moving upward and outward until you separate as much skin from the breasts and the joint where the thigh meets the body.

Whole duck purchased from poultry farm. You can opt to keep the head and feet on like the traditional Peking duck, or remove them with your heavy-duty cleaver.
The skin is easily separated from the meat by inserting your fingers, instead of having to use a bicycle pump.

2. To make the marinade: Combine the honey, crushed rock sugar, soy sauce, salt, 5 star anise, cloves, cinnamon stick, 1 of the sliced knobs of ginger, orange peels, peppercorns, coriander seeds, fennel seeds, and five-spice powder into a medium pot. Add 1.5 cups of water and bring to a boil. Reduce the heat and simmer for 20 minutes. Let cool slightly.

3. Take the duck and stuff the cavity with the remaining knob of ginger, 4 anise seeds, small bunch of green onions, and garlic cloves.

4. Add the duck and the marinade to a large container or bowl, turn the duck to coat evenly. Repeat the turning every minute for 10 minutes. Set aside to marinade in the spices for 1 hour or longer in the fridge.

marinading duck

5. Remove the duck from the bowl and set it on top of a wire cooling rack, which has a rimmed cookie sheet beneath it to catch drippings. Combine kosher salt and baking powder in a small bowl. Sprinkle evenly all over the duck’s surface.

6. Place the duck and the entire tray, uncovered, and place into the refrigerator to air dry for 14 to 30 hours. You want a completely dry duck with a leathery appearance. Sounds weird, but trust me on this one.

7. When the drying time has ended, fill a large stockpot with enough water to cover your duck for dunking and bring to a rolling boil. Use either a meat hook or kitchen twine to securely attach your duck. I did not have a meat hook, so I used a long piece of twine and wrapped it underneath the duck wings with enough length leftover to safely allow me hold onto it and dunk the duck into the boiling water. Rapidly dip the duck into the boiling water two times, each time for 10 seconds. The duck skin should now look smooth and taut, no more wrinkly leather appearance. Place the duck on a wire rack, blot dry with paper towels, and allow to dry for 10 minutes. If you have a lot of time and patience, you can dry overnight in the fridge again for super crispy skin, but I certainly “ain’t got no time for this”!

Loop twine under both wings for a secure grip.
Dip the duck into the boiling water 2 times for 10 seconds each time.
After dunking, the duck skin is now smooth and tight. (Wish that worked on my skin!)

8. Heat your oven to 350 degrees Fahrenheit, with the rack at the lowest position. Take an emptied drink can, fill it halfway with water or dried beans, and insert it into the duck cavity. Stand the duck upright on a wire rack set in a rimmed baking sheet. I had to break a duck leg and its tail to get it to stand. Violence is sometimes required, I guess. Roast the duck for 1 hour, rotating the tray each 30-minute interval for even browning. After 1 hour, the duck should be a beautiful golden brown.

Reduce the heat to 275 degrees and continue to roast the duck for another 30 to 40 minutes, or until the fat stops dripping. (Note: you can save the fat drippings in a glass jar and store in the fridge for frying different foods later. It’s like liquid gold!)

9. Allow duck to cool down for 5 to 10 minutes. Transfer duck to a cutting board and use a heavy butcher knife/ cleaver to cut the duck into pieces. I chop the duck up by first removing the head and appendages. Then I split the duck in half lengthwise, then that half in half again lengthwise, and lastly chop each of those lengths into smaller parts. Repeat the same for the other half.

10. Serve the duck with fluffy steamed buns or Mandarin pancakes, rice, or noodles. You can’t go wrong. Most importantly, savor and enjoy!


Vietnamese Fried Flounder “Boat” with Spicy Dipping Sauce [with Full Video]

One of my favorite things about the cooler autumn months is the prevalence of flounder in the Gulf of Mexico. My husband and I will either take our boat out and catch them at our favorite fishing hole, or we will take a canoe out into the grassy marshes in search of them while getting some exercise. Flounder is among the easiest fishes to cook and enjoy, and perhaps the most common preparation is frying. In Vietnam, flounder is commonly prepared fried whole (with the head on) and served as a family centerpiece dish, where each person flakes off some fish with their chopsticks and dips the sweet white flesh into spicy fish sauce.

Perfect fall day for flounder fishing

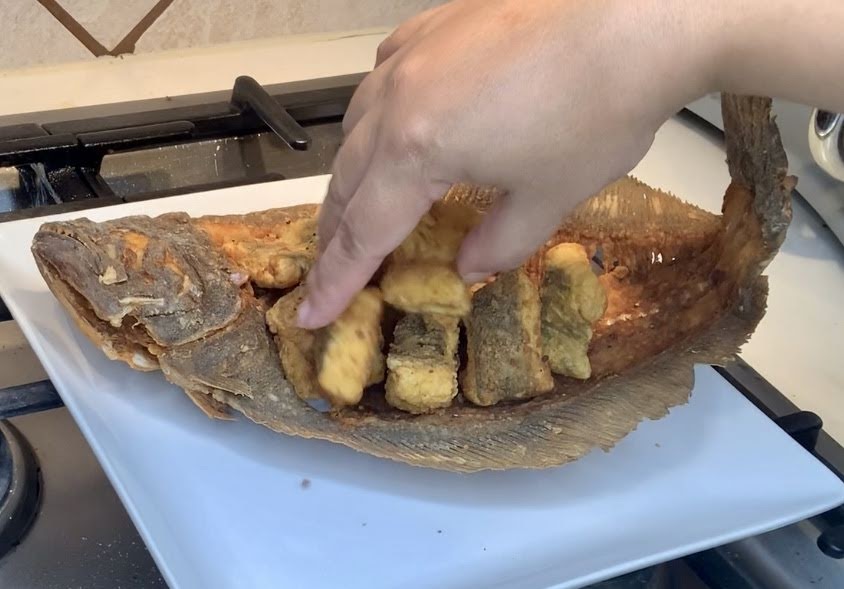
The Vietnamese are also known to be very resourceful, not wasting any part of the fish if they can help it. In this recipe, I prepare one of my favorite flounder dishes (fried, of course!) that is simple to prepare but looks very sophisticated when presented at the dinner table. An added perk is that none of the fish goes to waste because if you fry up the fish skeleton to a crisp, you can even eat it like chips. But if you’re not into eating crunchy bones, the fried flounder skeleton serves as a creative way to hold the crispy flounder nuggets. And what Vietnamese dish is complete without some spicy dipping sauce? The spicy, sweet, tangy, and salty fish dipping sauce perfectly complements the delicious flounder!

As in my other posts, I always emphasize the use of fresh ingredients. I truly believe the reason why people who are not fans of eating fish because they find the taste and smell too “fishy” is because the fish they are consuming has been dead and transported over many miles for quite some time. By the time the fish reaches them, the smell of ammonia has ruined the fish. Fresh fish should smell like the ocean and not overwhelmingly “fishy”. The flesh should be firm, the eyes should be bulging and shiny, and the inner gills should still be red. If you go to the fish market and see fish that wreaks of rot, the flesh is soft and smooshy, the eyes are sunken and dull, and the gills are brown or rusty red, stay clear away because that is bad fish. Just as fruits and vegetables taste their best during peak season and harvested locally, the same applies for seafood. If you can get freshly caught flounder for this recipe, it will taste amazing! Also, be sure to use new oil to fry the fish.

** Disclaimer: Please note that the highlighted links in this post are affiliate links, in which I will earn a small commission (at no additional cost to you) if you purchase through those links. I have purchased all the products I recommend with my own funds and have tested and used each product before I post. Please know that I only recommend products that I like and trust and genuinely believe would help my audience. Thank you for your support of my blog in this way!

Vietnamese Fried Flounder “Boat” with Spicy Dipping Sauce

Ingredients: (1 fish makes about 4 servings)

For the Fish:

  1. 1 very fresh flounder, approximately 2 pounds and 14-16″ in length
  2. All-purpose flour for dredging
  3. Salt and pepper to taste, or your choice of seafood seasoning
  4. Peanut oil for frying

For the Spicy Fish Dipping Sauce:

  1. 1/2 cup good quality fish sauce (I use either Red Boat or 3 Crabs Brand)
  2. 1 cup filtered hot water
  3. 1/2 cup granulated sugar
  4. 1/4 cup freshly squeezed lime juice (or rice vinegar if no limes available)
  5. 1 teaspoon freshly minced red chili peppers (more or less to desired spiciness)
  6. 1 teaspoon freshly minced garlic (more or less to taste)

Useful Equipment:

Directions:

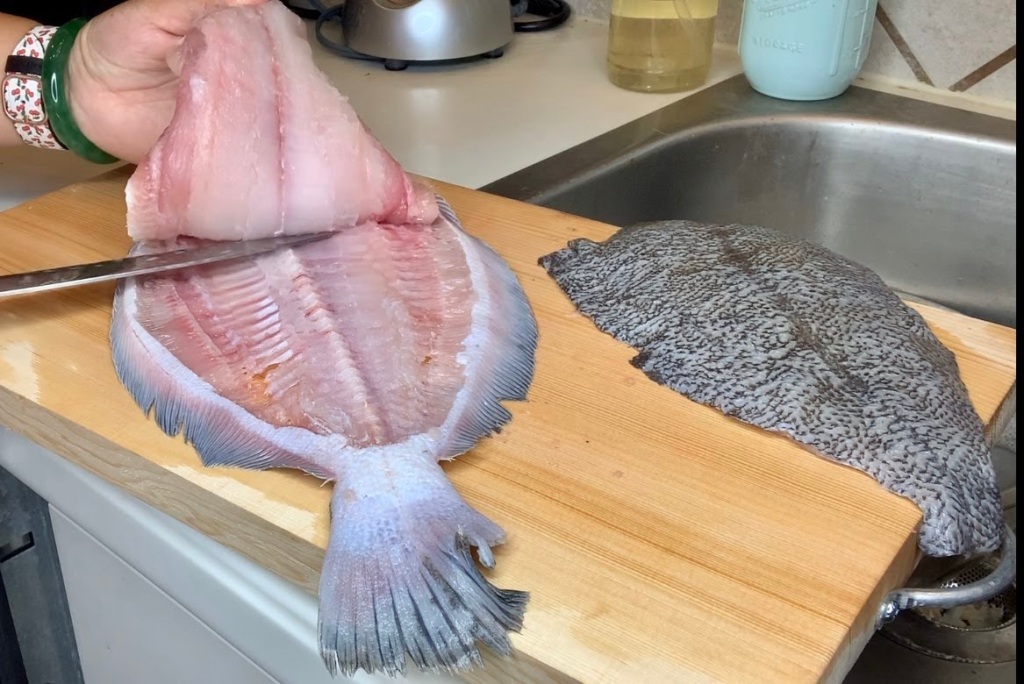
1. If you are purchasing your flounder from the fish market, ask the fishmonger to descale both sides of the flounder and remove the guts and smaller fins. Cut out 2 large filets, one on each side of the flounder. You can opt to leave the skin on the fish or have it removed. Leave the skeleton intact with head and tail. If you are cleaning your own catch, then follow the same instructions.

Descaled and gutted flounder
Flounder separated into 2 large filets, one from each side. I kept the skin on the filets because I like eating the skin, but you can remove the skin from the filets before cutting into nuggets and frying. Leave the entire skeleton intact.

2. Take the filets and cut into 1 to 2″ chunks. Season the fish nuggets with black pepper and salt or with seafood seasoning. Set aside.

Cut the flounder filets into nuggets. Season with salt and black pepper.

3. Pour wok halfway full of fresh peanut oil and heat up to high.

4. Dredge the fish nuggets with all-purpose flour in a plastic or paper bag. Coat each piece well. There is no need to pre-dip the nuggets into an egg wash, unless you want a thicker coating.

5. Season and dredge the flounder skeleton in the bag of flour. I recycle clean grocery bags for this because they are big enough to hold the entire skeleton. Set aside.

Dredge the entire fish skeleton in flour.

6. Place the floured fish skeleton carefully into the hot oil. If the entire fish doesn’t fit, fry the body first, and then fry the head and the tail sections last. Press the skeleton against the rounded wok bottom while frying to form a bowl shape in the fish. You can use your tongs to bend and shape the fish skeleton while frying. Once the skeleton “bowl” is crispy and golden brown, drain on paper towels and set aside.

7. Add the flounder nuggets to the hot oil and fry until they turn a deep golden brown. Drain on paper towels.

8. Place the fried flounder skeleton onto a plate and arrange the flounder nuggets into the “boat”.

Place fried flounder nuggets into the fish “boat”
Voila! Finished flounder masterpiece!

9. For the dipping sauce, dissolve the granulated sugar into the hot water. Next add the fish sauce to the sugar water. (If you have never worked with concentrated fish sauce (“nuoc mam”) before, a word of warning is that it smells like stinky butt. LOL! But once mixed with the lime juice and garlic, the smell eases up and the flavor is wonderful!) Once the diluted fish sauce has cooled down, add the lime juice/ vinegar, minced garlic, and chili peppers. Stir well and serve each diner a little bowl of fish sauce, so that they can dip their fried fish into the sauce. **If you absolutely do not like fish sauce, you can substitute your dipping sauce with soy sauce or sweet and sour sauce.

I hope you enjoyed reading this entry on a different way to prepare and present flounder. Thank you for stopping by! I hope all of you have a wonderful week ahead. If you would like to see more, please watch my YouTube video below:

For the video version of my story and recipe, please view my YouTube link. 🙂

How To Make Delicious Vietnamese Coffee and Make Starbucks Cry ‘Uncle’

I may be persecuted or even publicly flogged for saying this, but I dislike Starbucks coffee. I truly do. It’s expensive. It tastes burnt. Heck, it’s overpriced burnt coffee. There. I said it, so bite me. But before you go, please hear me out because I truly would love for you to try some great-tasting Vietnamese coffee if you haven’t already. Then maybe you’ll forgive my strong opinion of Starbucks.

Did you know that Vietnam is the world’s second largest producer of coffee and the world’s #1 producer of the “robusta” variety? If you don’t believe me, just Google it. See, I know my coffee because my people are major producers, for crying out loud! Just kidding. But in all seriousness, the Vietnamese love their coffee. They like to enjoy their cup of Joe nice and slow, and making the perfect cup is an art in itself.

Coffee was not always a thing in Vietnam. It was actually first introduced to the Vietnamese in the 1850’s by a French Catholic priest who brought over a single coffee arabica tree. Fast forward decades later, there are now many coffee farms that thrive in the lush highlands of Central Vietnam.

A coffee farm in the highlands of Da Lat, Vietnam
Fresh Robusta coffee beans

In the United States and other parts of the world, coffee is often accompanied by fresh milk or cream and sugar. Vietnamese coffee is distinctive in that it uses canned sweetened condensed milk. This is due mainly to the historical lack of dairy cattle and refrigeration. The sweetened condensed milk gives the coffee a unique sweet caramel flavor and velvety richness, a perfect complement to the strong roasted bitterness of the dark coffee. Perhaps the ultimate difference lies in the method of preparing Vietnamese coffee. Vietnamese coffee is a slow drip coffee using intentionally over-roasted beans. This creates a very thick, delightfully fragrant and strong brew. Instead of brewing the ground coffee beans in an electric machine, the ground beans are placed into a metal cup-like filter called a “phin,” sandwiched securely in a layer between 2 perforated stainless steel surfaces, and screwed into place. Boiling water is then poured into the metal filter cup, which then allows the coffee to drip slowly through the many tiny holes of the metal filter.

I remember my first trip back to Vietnam was in the summer of 1993. My family and I had escaped the Communists by boat in 1978, and we had not dared to dream of a day when we would be granted the opportunity to revisit the country we had fled. It was definitely an experience I will never forget. Unlike today when many Vietnamese Americans go back and forth on holiday to Vietnam (which is now a booming tourist locale), back in the early 1990’s there were fewer visiting ex-countrymen. Not only were the Communist policies still strict, but the cultural norms dictating the roles of men and women were also quite strict. The Vietnam of today is quite modern in both technology and social interactions. Women in Vietnam are striving to become more educated and self-reliant. However, back in 1993, women (especially those in the conservative countryside) were still expected to eat separately from the men, eat after the rest of the family was served, and be seen and not heard.

In 1993 I visited my paternal hometown of Song Cau, an idyllic fishing village in the province of Phu Yen in the central part of South Vietnam. Having lived in the United States since I was 4 years old, everything about Vietnam, and particularly this small coastal village, was quite backwards. My highschool-aged cousin was taught math by word problems that involved subtracting how many American airplanes were shot out of the sky. She honestly thought the Earth was flat. I was appalled. These were only some of the blatant examples of how closed off these people were.

So back to how this story relates to Vietnamese coffee… Men in Vietnam, then and now, customarily go to a coffee shop every morning and lounge around for hours sipping coffee and smoking a cigarette or two with their buddies. Then maybe they go to work. Most women take care of the kids, tend to the housework, and go to work or to the market. They do not lounge around in coffee shops. At least in 1993 they did not have that liberty. My first taste of Vietnamese drip coffee was in a coffee shop. In Vietnam. Surrounded by men. And they stared disapprovingly at me like I had 3 heads and a tail. It was definitely not a place for proper young ladies at the time. Thanks to my unabashedly bold uncles and my father, who broke tradition and allowed me to join their circle, I was able to taste such a delightful concoction! Since then I have never gone back to drinking regular coffee on the weekends. I say “weekends” because Vietnamese drip coffee requires time and patience. It does not produce the quick convenience of a Keurig or Nespresso machine, but Vietnamese drip coffee by far exceeds the taste of these mediocre packaged coffees, and there are no environmentally hazardous plastic containers to discard. I promise the effort is worthwhile!

One of the many roadside cafes in Song Cau, Vietnam where I had my first sip of Vietnamese coffee
Fisherwomen bringing in their morning catch in Vinh Hien, Vietnam. I took this picture on my daily 3-mile walk to the market at 5:30 AM.
A woman peddling her daily wares to sell
Women at the fish market in Vinh Hien, Vietnam
If you look closely behind the lady squeezing fresh sugarcane juice, you can see the guys in the background enjoying their glasses of black Vietnamese coffee. People of all classes love their morning coffee!
Men enjoying their morning meal and camaraderie in Hue, Vietnam…where are all the women? Cooking and working, of course.
Nightlife in Ho Chi Minh City (Saigon), Vietnam. You can see the bright lights coming from the Trung Nguyen Legend coffee shop in the background. Their slogan beneath the shop name literally translates to “Coffee of the wealthy and happy.”

**For a full ASMR-style video tutorial, please watch my YouTube video that I’ve attached at the bottom of this post.

Vietnamese Coffee (“Cà Phê Sữa”), served Hot or Iced

Ingredients: (This recipe is for 1 serving)

– 1 full tablespoon of ground Vietnamese coffee or French roast

I use the following coffee brands and can vouch for their quality:

– 1 to 2 tablespoons Sweetened Condensed Milk. The Vietnamese use the Longevity Brand Sweetened Condensed Milk because it is less sweet, but you can use any store-bought brand.

-Boiled hot water

-Ice cubes for iced coffee (optional)

Useful Equipment/ Tools:

Vietnamese coffee filter phin, Long-spout tea kettle, Tall glass

Making Vietnamese coffee requires simple ingredients but also patience.

** Disclaimer: Please note that the highlighted links in this post are affiliate links, in which I will earn a small commission (at no additional cost to you) if you purchase through those links. I have purchased all the products I recommend with my own funds and have tested and used each product before I post. Please know that I only recommend products that I like and trust and genuinely believe would help my audience. Thank you for your support of my blog in this way!

Directions:

  1. Fill tea kettle with fresh water and bring to a boil. Set aside.
  2. Take your tall glass or coffee mug (choose one that has an opening that is not too large, so that the metal filter cup can rest on top of the mug) and fill it with 1 to 2 tablespoons of sweetened condensed milk. You can add more or less to your taste. I like mine creamy, so I add 2 tablespoons to mine.
I like to watch the milk drip out of the can, but you can also just scoop out the sweetened condensed milk with a spoon. 🙂

3. Take the metal coffee filter (phin), remove the lid, and unscrew the top part from the cup body. Set the screwed part aside.

4. Fill the cup with 1 tablespoon of ground coffee.

5. Screw on the middle part and twist until you can no longer make a full turn of the screw. However, don’t twist the lid on too tightly or the coffee will not be able to drip through the little holes. If you find that the coffee is blocked when you pour in the boiling water, just loosen the screw a bit.

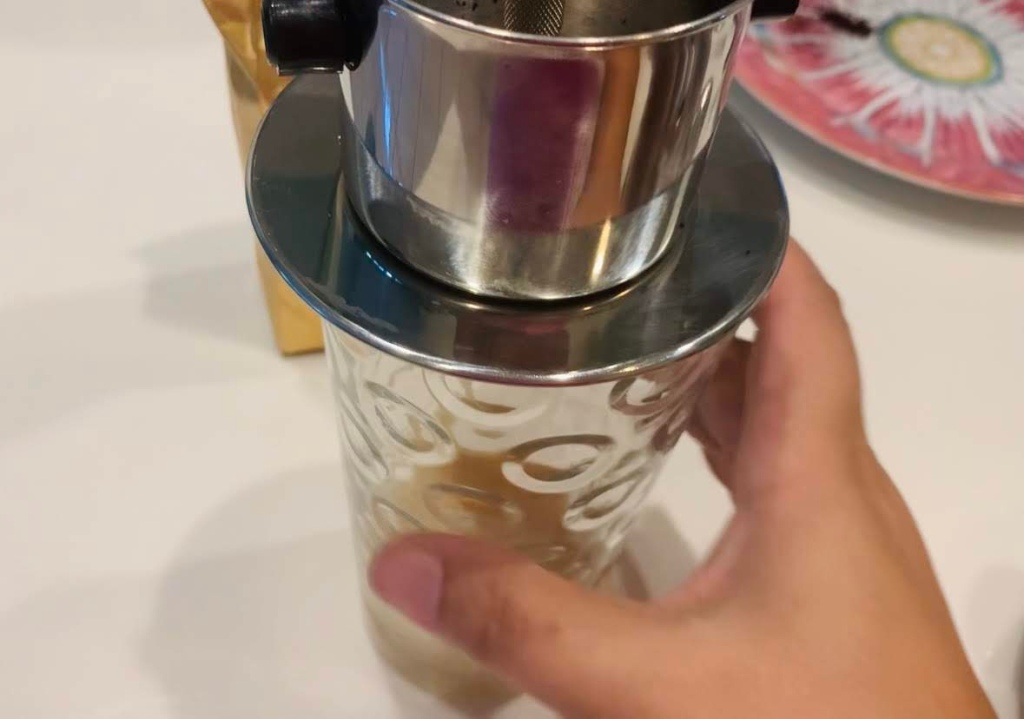
6. Set the filter on top of your glass or cup, and fill the inside of the filter with boiling water. You can add more boiling water to the filter as the coffee drips for a lighter coffee.

7. The coffee will take some time to finish dripping through the filter. When it is completed, stir up the coffee and the sweetened condensed milk together well. You can drink it hot at this point, or you can pour it over ice and drink it cold, like they prefer it in Vietnam.

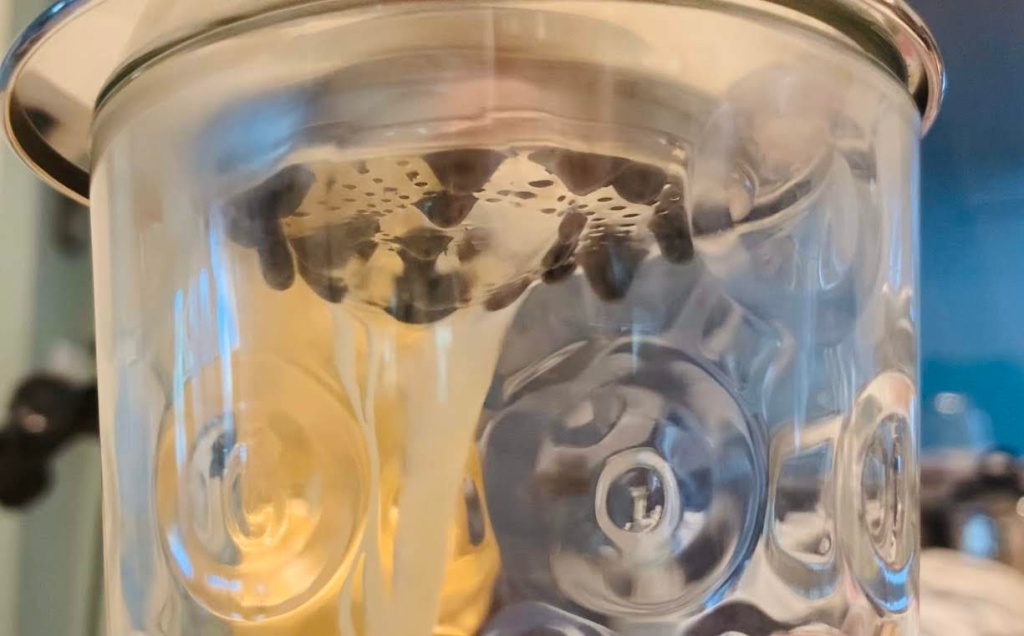
Slow, steady drips make a delicious rich coffee!
Stir up coffee well and drink hot, or pour over ice to drink cold.
Delicious iced coffee!

See how easy Vietnamese coffee is to make at home? I hope you give it a try. You deserve the best! Enjoy!

For the video tutorial of how to make Vietnamese coffee, please check out my YouTube channel:

Craving some really good coffee? Try making Vietnamese coffee at home! Easy and delicious!
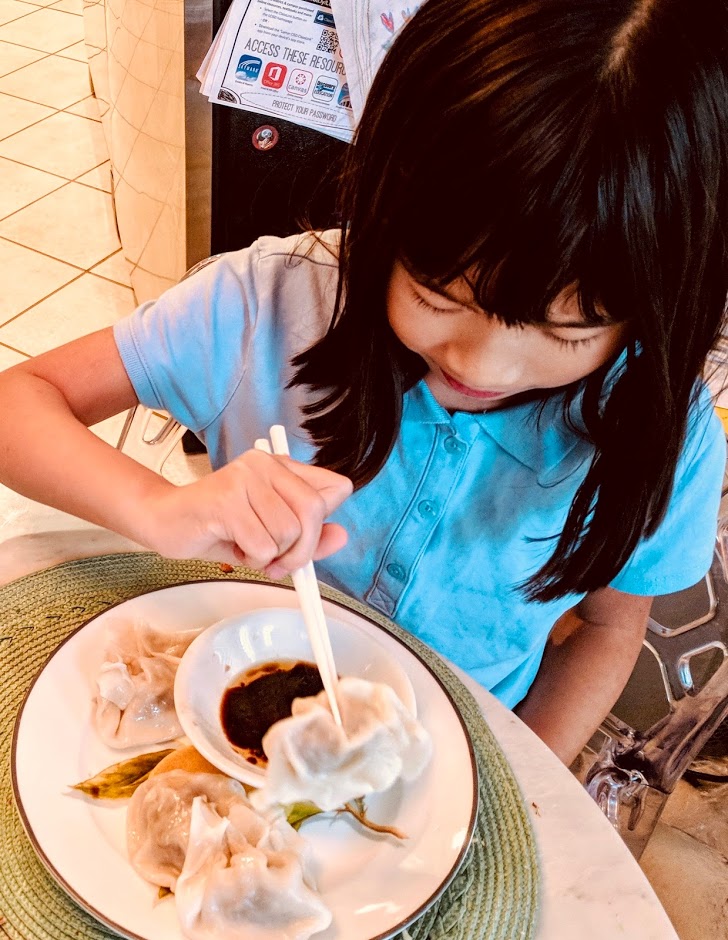
Soothing Asian Chicken Dumpling Soup

I never thought I’d come around to complaining about how cold it’s been recently…in Texas out of all places. Following the sweltering summer months, or rather most months of the year (because there’s really only 2 seasons here in South Texas– hot perdition and ice), the cooler temperatures should be a welcomed change. I’m just glad those half-dollar-sized mosquitoes are mostly dead. Even though the temperature is not as frigid here compared to many of the northern states (God bless y’all!), it’s still lovely to return to a warm cozy home filled with the noisy chatter of kids and the aroma of something delicious cooking on the stove.

One of the kids’ favorite dishes to eat when the temperature drops is homemade chicken wonton dumpling soup. This dish is light but filling at the same time. I feel good serving it because I know exactly what ingredients I put into my dumplings. Store-bought frozen dumplings tend to contain unpronounceable ingredients, MSG, and preservatives. And restaurant dumplings tend to be on the scanty side. Many times, you bite into a so-called dumpling and wonder where the dumpling is…more like eating boiled flour squares with no meat. Making dumplings at home is also important to my husband Kim, who has a phobia of food that is cooked wrapped in something– for example, eggrolls, burritos, and dumplings. His fear stemmed from his highschool years of working in a Chinese restaurant, where the penny-pinching owners would take the old left-over food from the buffet bar at the end of the night and combine it to make the filling of the next day’s eggrolls. I can’t really blame him.

For this soup, rest assured that it’s all fresh ingredients. No leftovers or fillers here. You can use any type of ground meat, but I will be using half dark meat chicken (thigh meat) and half breast meat. The reason for this is because ground breast meat by itself is too dry and coarse due to the lack of fat, but combining dark meat chicken to the breast meat makes a juicier and sweeter filling. You can also opt to use just dark meat chicken, turkey, pork, or beef. The dumpling wrappers can be easily made using 3 parts wheat flour to 1 part water, mixed to form a soft dough, rolled out thinly, and cut into circles. Because we working moms and dads don’t always have time to make scratch-made wrappers, I will be using store-bought wrappers in this recipe. They can be purchased fresh or frozen quite inexpensively at an Asian grocery store. If using frozen wrappers, be sure to thaw out in the fridge before wrapping time.

Asian Chicken Dumpling Soup

Ingredients:

For the Dumplings:

  • 1 pound chicken thigh/leg meat + 1 pound chicken breast– ground (2 pounds of any ground meat of your choice is fine, too.)
  • 1 cup shredded carrot/ cabbage combo (or buy fresh coleslaw mix) –You can also substitute any vegetable, like napa, spinach, bok choy, etc.
  • 1/2 cup black tree ear mushroom– rehydrate in warm water, drain thoroughly, and roughly chop.
  • 1 tablespoon minced ginger
  • 6 cloves minced garlic (again, I love garlic and hate vampires. Feel free to use more or less to suit your taste.)
  • 1 small white onion, finely diced.
  • 1 tablespoon sugar
  • 2 tablespoon oyster sauce
  • 1 teaspoon Kosher salt, or to taste
  • 1 teaspoon sesame oil
  • 2 tablespoons cooking sherry or Shaoxing wine (optional)
  • homemade or store-bought round dumpling wrappers, about 50
  • 1 egg, cracked and placed in a small bowl, for sealing the dumpling wrappers

For the Soup:

  • 4 quarts (1 gallon) chicken broth (You can make your own or use store-bought, just make sure to use the low-sodium kind).
  • 1 tablespoon Kosher salt (season to suit your taste. I’m being conservative here, so that you can add more if it is too bland.)
  • 1 tablespoon sugar
  • 1 tablespoon chicken bouillon powder or concentrate
  • 2 cups roughly cut chunks of daikon radish
  • 2 cups sliced mushrooms, any variety–I’m using king oyster mushrooms here.
  • 1/2 white onion
  • 2″ knob fresh ginger, peeled and split in half lengthwise
  • 1 teaspoon sesame oil
  • freshly ground black pepper to taste
  • thinly sliced green onions and finely chopped cilantro for garnish

Useful Equipment:

** Disclaimer: Please note that the highlighted links in this post are affiliate links, in which I will earn a small commission (at no additional cost to you) if you purchase through those links. I have purchased all the products I recommend with my own funds and have tested and used each product before I post. Please know that I only recommend products that I like and trust and genuinely believe would help my audience. Thank you for your support of my blog in this way!

Directions:

1. Prepare the dumpling filling by adding ground meat to a large mixing bowl. You can opt to buy the meat already ground from the store or butcher, or you can grind your meat using a meat grinder or a food processor. (I like the taste of freshly ground meat, and the Cuisinart food processor has done a great job for this task.) You can also chop and shred all the vegetables for this recipe using a food processor, as well. Add in all the ingredients for the dumpling filling (except the wrappers and egg) and use very clean hands or a large spoon to thoroughly mix all the ingredients together. Let the meat mixture sit and marinate in the fridge for 15-30 minutes.

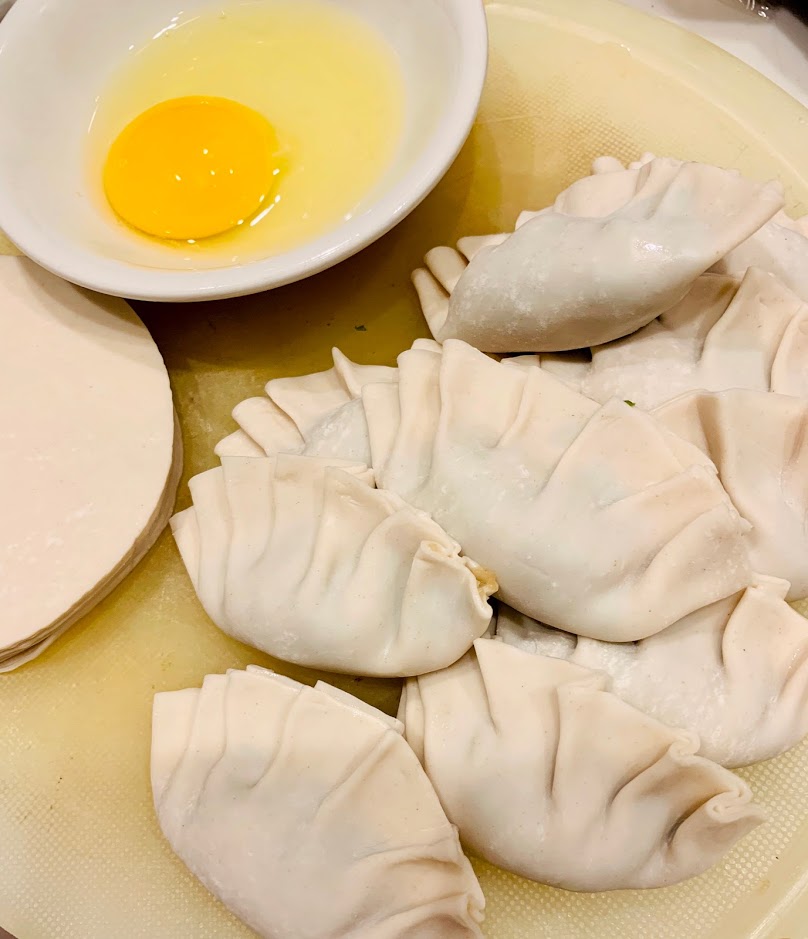
2. To make the dumplings, wash and dry your hands very well. Take a wrapper in one hand, place a teaspoonful of meat filling into the center of the wrapper, spread a thin layer egg white around the outer edges of the wrapper, press the wrapper together to enclose the filling (should look like a half circle), and crimp and pleat the wrapper to seal the dumpling. **Please view the following short video for a demonstration of this step. I’m not the best dumpling crimper, and if my mother-in-law were still alive, she’d probably give me a mild scolding, but you get the idea. Just make sure the dumpling is sealed securely, so that when it comes time to boil, it won’t fall apart! Repeat this for all the wrappers.

**At this point, if you’ve made too many dumplings to consume for the day, you can freeze these raw dumplings for future use. To do so, take the extra raw dumplings, spread them on a cookie tray, freeze them until hard, remove them from the tray, and store them in a freezer-safe container or bag in the freezer for up to 3 months. When you want to eat dumplings next time, just take the frozen dumplings (do not thaw) and boil or pan fry. This is such a time-saver!

Video Tutorial: How to form dumplings
(Please excuse the action-packed background noise. My kids were watching Men in Black 3.)
Sealed and crimped dumplings. Each dumpling has about 6-7 pleats.

3. To cook the dumplings, bring a medium pot of water to a rolling boil. Add in 5 to 7 dumplings at a time. Be careful not to crowd the pot, as this will cause the dumplings to stick together and tear apart. Reduce heat to medium-high, cook the dumplings about 7 minutes or until they rise to the surface. Use a slotted spoon to remove dumplings from the water. Set aside on a clean plate. Repeat cooking until all the dumplings are done.

4. Prepare the soup by bringing the chicken broth to a boil. Add in the half onion, daikon radish chunks, and ginger. The onion and ginger will serve as aromatics for your soup, while the daikon radish will add sweetness and depth of flavor. Reduce heat and let soup simmer for 10 minutes.

5. Add in the seasonings: sugar, salt, chicken bouillon.

6. Add in sliced mushrooms.

7. Simmer soup for 15 minutes, so that all ingredients will release their flavors into the soup.

8. Before serving the soup, bring pot to a boil once more for 2 minutes. Then decrease heat to a simmer and add in sesame oil and black pepper. You can discard the ginger, daikon radish, and white onion chunks at this time, or just leave them in the broth for richer flavor.

9. Place as many cooked dumplings you desire into a soup bowl. I like to serve 5 to 6 dumplings per bowl. Ladle hot soup into the bowl to cover the dumplings.

10. Sprinkle freshly ground pepper, chopped green onions, and cilantro for garnish if desired.

This soup is excellent for warming up cold winter days, as well as soothing a sick loved one. Before I conclude, I would like to mention that if you want to forego the soup, you can also prepare the dumplings as a stand-alone dish. Just simply make the dumplings, boil or pan-fry them, and serve them with a dipping sauce (such as mixing Sichuan chili oil with soy sauce and black vinegar). My older daughter enjoys eating them in this fashion. I hope you enjoyed reading my entry today and will try making Asian dumplings instead of buying them for a refreshing change. Wishing everyone a great week filled with lots of health, happiness, and delicious food!

Dumplings can be served simply with sauce or in a soup.

Beetroot Watermelon Juice– How to Stay Young Forever Like a Vampire!

I vant to suck your blood! LOL!!!

Happy Halloween, everyone!  I vant to suck your blood…beet juice blood, that is!  So I know you looked at that title and said, “Wow! I wanna stay young forever like a vampire, too!”  Right?  Okay, maybe that’s a stretch, but I tried, photo-shopped picture and all.

However, I must say that the older I get (I’m 44 this year—yikes!), the less I use and depend on face creams, lotions, and potions, and the more I turn to real food to nourish my body from the inside out.  

    In line with the Halloween theme here, I wanted to share one of my bloody favorite drinks to consume before a workout or run.  This juice is refreshing, energizing, and chock full of nutrients and vitamins like Vitamin A, Vitamin C, Vitamin K, Calcium, Iron, Magnesium, Potassium, and Lycopene.  Beet juice itself is rich in nitrates, which the body converts into nitric oxide, and in turn helps with blood flow and blood pressure.  Many runners and athletes are beginning to look at beets differently, attesting to the idea that beets may boost stamina for increased exercise duration.  

    Enough of all the scientific mumbo jumbo.  In my own drinking experience, I find this juice makes me feel energetic and puts color into my cheeks and makes my skin glow.  I hope you enjoy this simple, yet effective recipe!  I do like to drink beet juice straight up, but because a lot of people may not like the earthy flavor of beets, blending together with other sweet fruits and vegetables helps sweeten and conceal the earthy taste.  

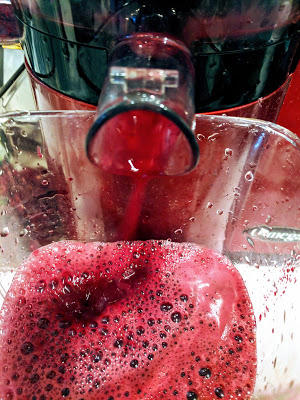
The juicer I use is this one by Omega. I’ve had it for 4 years now, and it still runs as smoothly as the day I purchased it. It’s pricey, but I wanted to invest in a good quality masticating juicer that produced the most juice with a dry pulp (which I use as compost in my garden). However, you can use any juicer you feel suits your needs. There are several out there that do a good job. If you don’t have a juicer, you can use a blender and blend all the ingredients with water, then strain through a fine mesh sieve or cheesecloth.

** Disclaimer: Please note that the highlighted links in this post are affiliate links, in which I will earn a small commission (at no additional cost to you) if you purchase through those links. I have purchased all the products I recommend with my own funds and have tested and used each product before I post. Please know that I only recommend products that I like and trust and genuinely believe would help my audience. Thank you for your support of my blog in this way!

Beetroot Watermelon Juice

  • Ingredients:
  • 2 whole small to medium sized raw beets, cut into chunks that will fit your juicer feed
  • 2 cups cut up watermelon, removal of rinds optional (if keeping rinds on for maximum nutrient extraction, watermelon must be scrubbed clean before cutting)
  • 2 carrots
  • 1/3 lime, peeled
  • 2 sprigs fresh mint
  • 1″ piece of fresh ginger, peeled
  • Useful Equipment:
  • Electric juicer (I use the Omega Upright Masticating Juicer)
  • Breville Juice Fountain XL Juicer (another excellent option I have tried)
  • Vitamix 7500 Professional Blender (a good substitute if you don’t have a juicer, but you will need to strain the juice using cheesecloth)
  • NutraBullet Pro Plus Blender (this is a much cheaper option that is still pretty powerful, but you can only blend small quantities and will need to strain juice using cheesecloth or mesh strainer)
  • Fine Mesh Chinois Strainer (only needed if using a blender)
  • cheesecloth (only needed if using a blender)

1.  Wash the produce thoroughly, especially the beets and carrots.  I keep the skin on if they’re organic beets and carrots (lots of nutrients in the peels).


2.  Juice all ingredients.  


3.  Pour into glasses, garnish with extra limes and mint leaves.  Consume immediately to benefit from the fresh nutrients. Cheers to excellent health! Happy Halloween, my lovelies!

Happy Halloween from the Man in Black, Frida Kahlo Day of the Dead, Spicy Sriracha, and Edna Mode!
Looks like these kids would’ve been better off getting their sugar high from Beetroot Watermelon Juice!